9.7.15

Bridesmaid Proposal: Packaging

Yeay, we've come to part 2 of this post! Up to now, I,ve got 4 yeses to the proposal. Well, 4 down, 6 more to go. I must say, the proposal part was the most nervewrecking. I went hours practicing how to present the proposal and what I would actually say when the time come. seriously! i did talk to myself over and over and practice the best, coolest way to propose to my girls. yup! i'm pathetic like that. yet, when the time come, I was tongue-tied. gone already the hours of practicing, and I sat there like a dumb duck and just shoving the box to their faces. yup i literally tongue-tied as I cant even say a word. thankfully the packaging have all the words that i'm supposed to say and its self explanatory in itself. ha! now i'm praising myself to come up with that idea of packaging, a fool-proof idea for a nerve-wreck such am i.

What are this brilliant idea of mine? here goes;

this basically are the items I used. small pink boxes from kaison, i got it for rm4.99 for 12 boxes, polka dot ribbons, rm1.95 each from cowboy, and perfume card paper, rm4.15 from popular.

so first, we fold the lower part of the box. du'uh. or else it wouldnt be a box aight?

okay, now, we've got a box. however, it is a bit big to fit just a small ring inside, so we hv to think of a way to fill it in with something.

walla! my great idea. haha. so i folded extra papers; trial paper for tags, misprint notes, last year tutorial paper. haha. basically any recycled paper. cz i'm one crazy bitch about preserving the nature and conserve paper (but mostly save my own money) haha. then i cut it into small strips of paper.

well, here is what it would look like roughly, u can really just cut it as u please and dont really worry about the size. luckily i dont suffer from OCD or perfectionist mentality, so this doesnt bother me at all. but if u want, u can actually measure it and cut it properly but it will take longer time though.

Then u have to single out all the strips of paper and roll it gently with ur hand, u'll roughly get something like this.

next is the self-designed tag to place the ring. I print it out on the perfumed paper. 

individual tag. the cross was done using kitchen knife, cz i'm creative liddat. ;P

so basically this is how it will looks, when the box is opened. as i said, self explanatory. the message is sent loud and clear without me saying a word..tee-he.

this is somehow, a last minute idea to include some basic bridesmaids duties. I wrote my heart out in this one. (eye glistens)

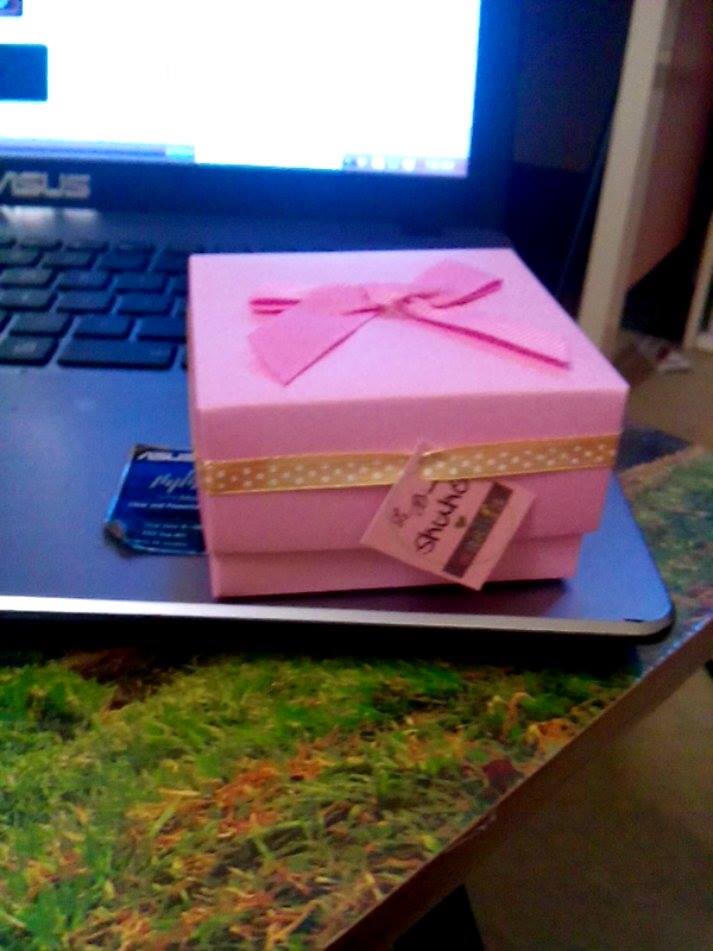
finished products. hee~ well i didnt took pictures while preparing the top part of the box. so basically i fold it out. and then since i figured its to plain, i decided to use the ribbon to brighten it up a bit and use the same printout (the trial one) for the ring design as the tags. I simply use the paper puncher to make a hole and i thread it using the ribbon which i later glued n the sides of the top box.

all 10 boxes waiting to be sent out! weeee~ silver ribbon was reserved for the most special of all my maid of honor, my lil sis, teha. <3 p="">

that's about it. i know, i'm more invested in the bridesmaid proposal then about the actual wedding planning right now, cz I truly think this 10 girls are important persons in my life and it turns out, bribing them with ring really is useful as the yeses is now actively participating in the wedding planning at the burden was removed substantially. glad that I asked them early as I did. well, now we already have planned a trip to look for fabrics for my akad attire and bridesmaid dresses, courtesy of my first two yesses, ja and pika. can't wait for the trip. will post again soon.

p/s: did i say anything about my third proposal to mira? I basically chickened out. I give the box to her, than I ran. I do feel like giving present to the senior I've spent my whole junior year liking. my fourth proposal to lobak? it was certainly better than the third one, i didnt ran away. I really wanted to say it was because of my confidence kicking in, but truth be told, her room was dark, when I went there cz her roomate is sleeping, and I find solace in the dark. ha!

pp/s: I'm actually freaking out about my fyp. the material cost were ginarmous and i dont know where to go to get the necessary supplies. *sigh*

3.7.15

Bridesmaid Proposal: Photo Ring DIY

from my previous post, i already decided to do photo ring for my bridesmaid proposal, so here is the how. first step, is ensuring that u have all the tools and material needed. so after scouring the internet, and watching dozens of tutorial, i kinda get the idea of how and what to buy. so material needed (or at least the one i used was :-

1. Glossy Photo Paper
2. Ring Base
3. Glass Cabochon
4. Adhesive / Sealant

and that's about it. really its that simple. so where do i get all the stuff? easy! photo paper can be bought in most stores, mine was free gift for buying ink cartridge for my printer. As for ring base and glass cabochon, i bought it online. it has various size and shape. at first i wanna go with round ring, however this item was out of stock and i have to improvize, therefore:-
the setting that i originally wanted but out of stock; from: beading.my

the one i stumbled upon while venturing through the web saddened by the fact the ring base above was out of stock, RM1/piece, from: malaysiaclayart.com

oval glass cabochon; pack of 10 pcs : RM6.36; from: beading.my

next thing was adhesive/sealant, in most tutorial, dimensional magic mod podge is a common occurrence. however, it never occurs to me to try and search mod podge in malaysia, so i just go with diamond glaze also bought from beading.my at RM29.68. this adhesive is water soluble and so far i have got no problem using it, but i'm pretty sure, it doesn't make my ring waterproof though. you might want to do more research before deciding on the adhesive though.

so far, i've got all the material covered. next thing would be the design for the rings.
yup, i wasnt very good with any photo editing software, so i just use the easiest one, powerpoint.

#1: i serached the internet for the background and save it, since i would like a pastel themed, most of the background are pastel colours.
#2: next i play with the hashtag and i certainly want it to be in pastels as well. font : Fredericka The Great. downloaded from 1001fonts.com
#4: my workspace: i started with oval shape, with the height and width as per  specified for the ring base, and then i work on the backhround, name and all.
#3: final results.

i tried printing the final results and i kind of dislike the finishing. though it look good on computer, but it isnt that good on paper, thus i decided to change the background and it turns out like this:-
the font for name was Churli_Cute also downloaded from internet, but i forgot the site. google it if u want, and for the Le B'maid, font : Brotherhood script

well, it really is true that, the simpler the better. and i kind of in love with the new design. ngee~ 

design done! next is the ringgg~
all the needed material, not shown, scissor and jarum peniti, and ring base.

so first, clean the glass cabochon, then apply the glaze on the back of the cabochon. nest, put it on the design and swirl it slowly to remove the air bubble and adjust the alignment of the design with regard of the cabochon. Let it dry for about 40 minutes.
after it is dried, use scissor to cut the extra paper and u'll get the above look. as u may see, the surface was not smooth due to the extra adhesive dried on the surface, but worry not, we'll be able to clean it as the adhesive was water soluble after all and best left the cleaning towards the end.

this is an extra step, u can opt to not do it, but for more protection, i apply the glaze on the side of the glass cabochon and also the back of the photo paper. this is to give a thin film protection. this is an extra measure that i did though.

Let it dry for another 20 ~ 40 minutes.

Next, i apply the adhesive into the ring base, and i put a little extra on the circumference.

then i place the glass cabochon and squeeze it so that the remaining adhesive will ooze at the circumference, this is to ensure that extra adhesive will be there on the space between the side of the ring base and the glass cabochon and hopefully it will harden and fill in the space.

since i don't have any ring holder, i use a wooden clip to hold the rings upright while letting it dry for 60~90 minutes. When it dried, dab a cloth with water and clean the surface until u get a clear finish.

walla~ u have u're own personalized ring.

all the above steps are not the absolute way of doing these, u may customized steps accordingly. same goes with the time left to dry, u might want to wait longer and shorter, its up to you though, me myself did not exactly follow the time duration mentioned.

rings, DONE! 

next should be the packaging. i'll be heading to craft store tmrw to figure out that part. will definitely share it when its done. hope this tutorial has been beneficial.


till later!

love,
nia.


bridesmaid proposal

yup, u read it right! this is a diy project i'm currently doing. since it was supposed to be a secret, i cant really tell anyone except for mkisa, and he's been really stressed out with start of work and moving to new place that i cant blame him for not giving me the appropriate response. what kind of response do i expect? hurmmm, well the usual girly stuff....squeal, giggle and all. so, basically since i have no one else to talk to, its natural that i came back to this blog. i know, i know. i promise to write about korea, but then i don't. well nothing much really, just lots of pics. so lets just leave it at that shall we?

okay, before i ramble on and on, lets get back down to business. well, this minty girl are going to get married soooooon and right now, i'm about to propose to my girlfriends so that they'll become my bridesmaid. since being bridesmaid is a big deal, they have to spend money on dresses and shawls, they have to spend time, they have to lend their ears when i go bridezilla, (yup, i'm that kind of bride, real demanding!) so i think i better mooch up to them from the very start and i decided to propose to them. i've browsed a lot of ideas on the internet and have come up with different ideas and i changed my mind everytime. what are the ideas that i have in mind? lets see:-

1. A care box, with details of my planned wedding and a homemade scrub or lip balm (beauty product)

then, i changed my mind cz it would be very hard doing that beauty product

2. why not bracelet, with tag personalized engraved charm (the hashtag of my wedding; its "#ashfa" btw)


yup, i've browsed the tag thingy and i cant buy it for less than 100, so its not like i'm going to have 100 bridesmaid and cost was an issue. then,

3. a ring pop, cz i've encountered a lot of related ideas on the web and i stumbled upon this post, and i fell in love~


however the cost was rm14 per ring, and i thought, what if i buy and then they refused to be my bridesmaid, rm14 wasnt really a small amount of money, and considering i wanted to ask 10 gf as my bridesmaid, the cost is too high (10???!!!?...as i said before, DEMANDING bride :P)

4. A small portfolio of what i wanted, pic, itinerary etc.


and considering i was a very lazy person in nature, the thought of doing 10 envelope with at least 5 pieces of card each and i have to be creative on top of that, the thought really literally makes me shudder. so, i opt of sharing that information online, so i am able to do it once, and be access by all 10 at the same time (considering all say yes though)..hehe.


so after endless hour of net surfing, (i kinda put this first rather than my fyp which shows i'm bad at prioritizing and make me realize i really need to rethink about my future career..lets discuss that in another post though) i found a way to do the ring by myself. and i am thrilled!!!!! can't wait to share my progress here~